 Brainerce Help
Getting started
Set up your Brainerce store from scratch, covering account, store, first products, and first order.
This guide walks you through the first 30 minutes with Brainerce. By the end you'll have a published store with a product, a payment method, and the ability to take a test order.
1. Create your account
- Go to app.brainerce.com/sign-up.
- Sign up with your email or Google account.
- Confirm your email by clicking the verification link in your inbox.
2. Create your first store
- After signing in, Brainerce walks you through a short setup wizard covering store name, currency, and language, then tax, shipping, and email defaults (all changeable later).
- Review the summary and finish.
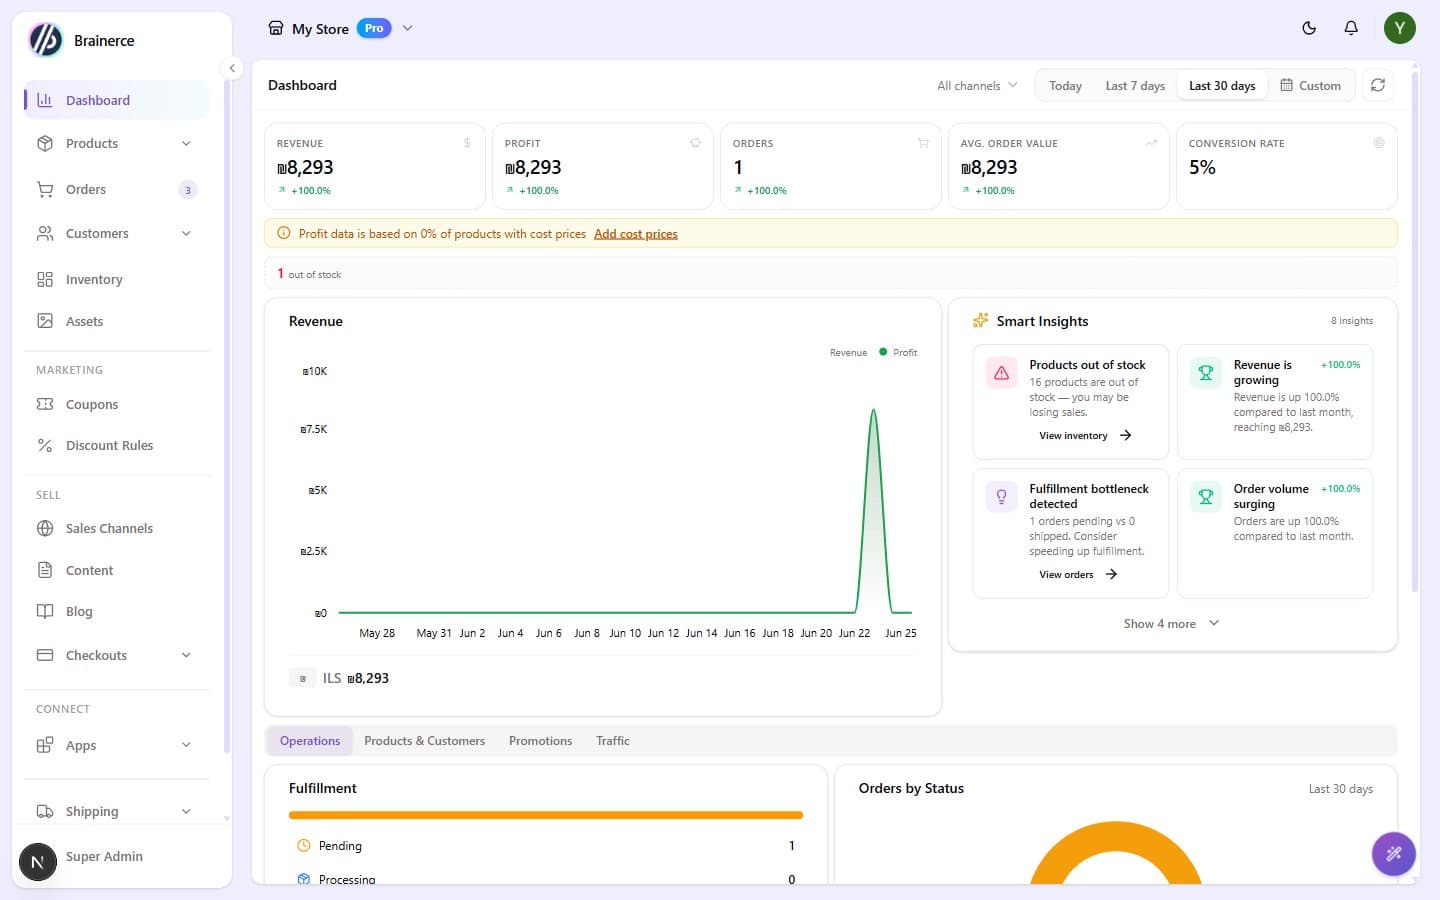
You're now on your store dashboard. The left sidebar is your map: Products, Sales Channels, Orders, Customers, Inventory, Coupons, Discount Rules, Checkouts, Shipping, Assets, Content, Blog, Apps, Settings. (There is no single “Marketing” entry; Coupons and Discount Rules sit at the top level under a Marketing heading.)
Sales Channels is the one to know about early: it is where you create a storefront channel and copy the Connection ID that wires a Lovable, v0, Cursor or hand-written site to this catalog. See what to set up first: connecting a storefront is step 2, not the last thing you do.
3. Add your first product
- Click Products in the sidebar, then Add product.
- Fill in Title (e.g. "Brainerce T-Shirt"), Price, and at least one Image.
- Set Stock to a number greater than 0 so the product can be sold.
- Click Save.
The product appears in your catalog with a green In stock badge.
4. Connect a payment provider
You can't take real orders until at least one payment provider is connected.
- Open Apps in the sidebar to browse the marketplace.
- Click the payment gateway you want and click Connect.
- Finish the provider's sign-in to authorize Brainerce.
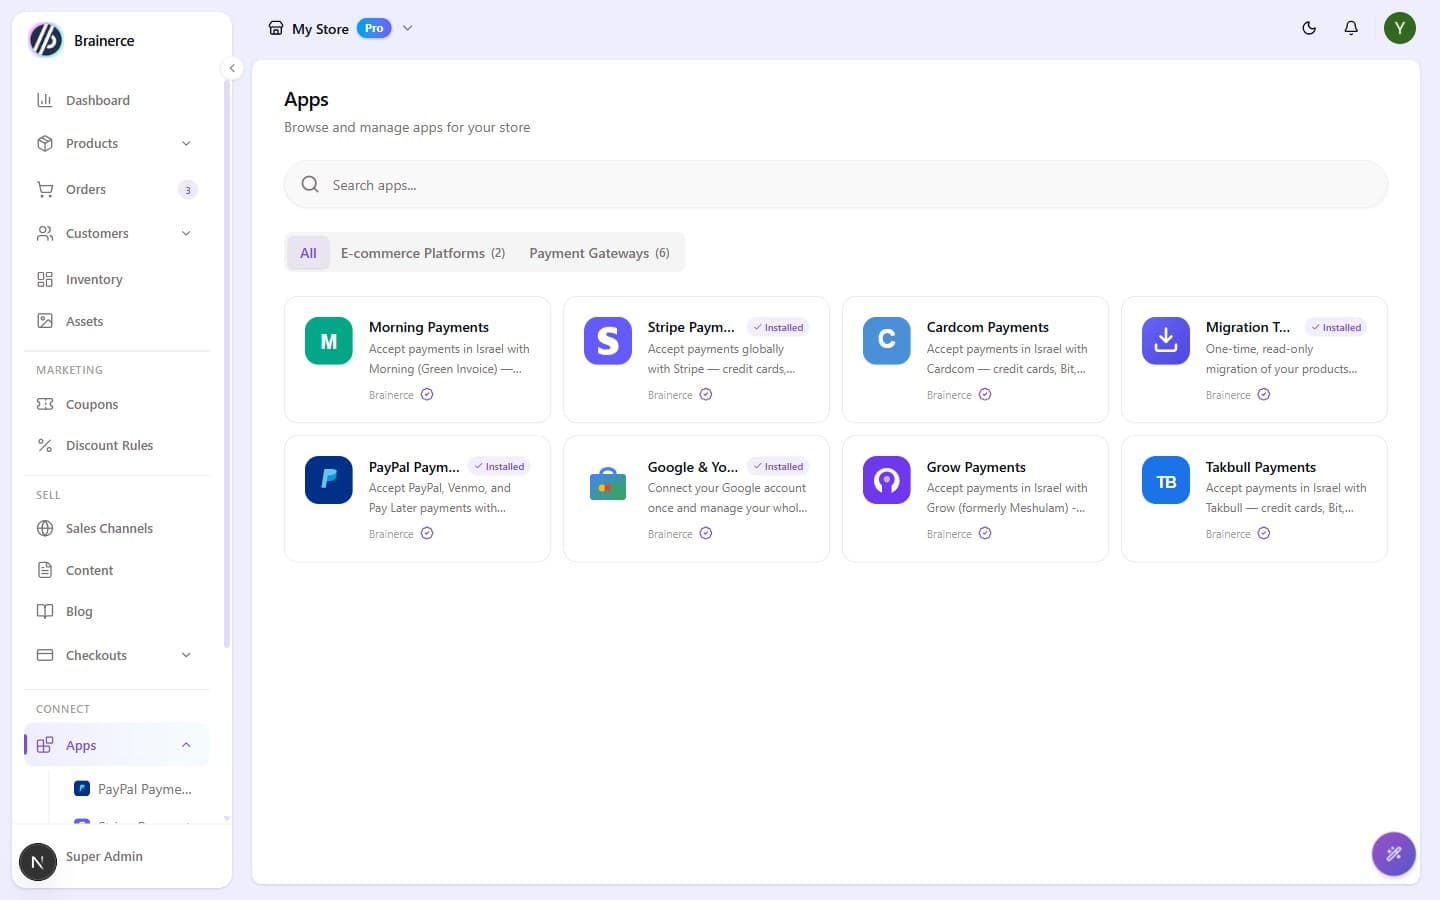
The gateways you can install today are Stripe, Cardcom, Grow, Morning (Green Invoice), Sola and Takbull. PayPal is not released yet: it does not appear in the app store and cannot be installed, so pick another gateway rather than waiting for it. (An older version of the screenshot above shows PayPal; ignore it.)
For the full walkthrough, including making a provider available in each region, see Configure payment methods.
5. Take a test order
- New providers start in Test mode (open the app under Apps in the sidebar to confirm), so you can order without moving real money.
- Visit your storefront URL (top of the dashboard) and add your product to the cart.
- Check out using a test card (Stripe:
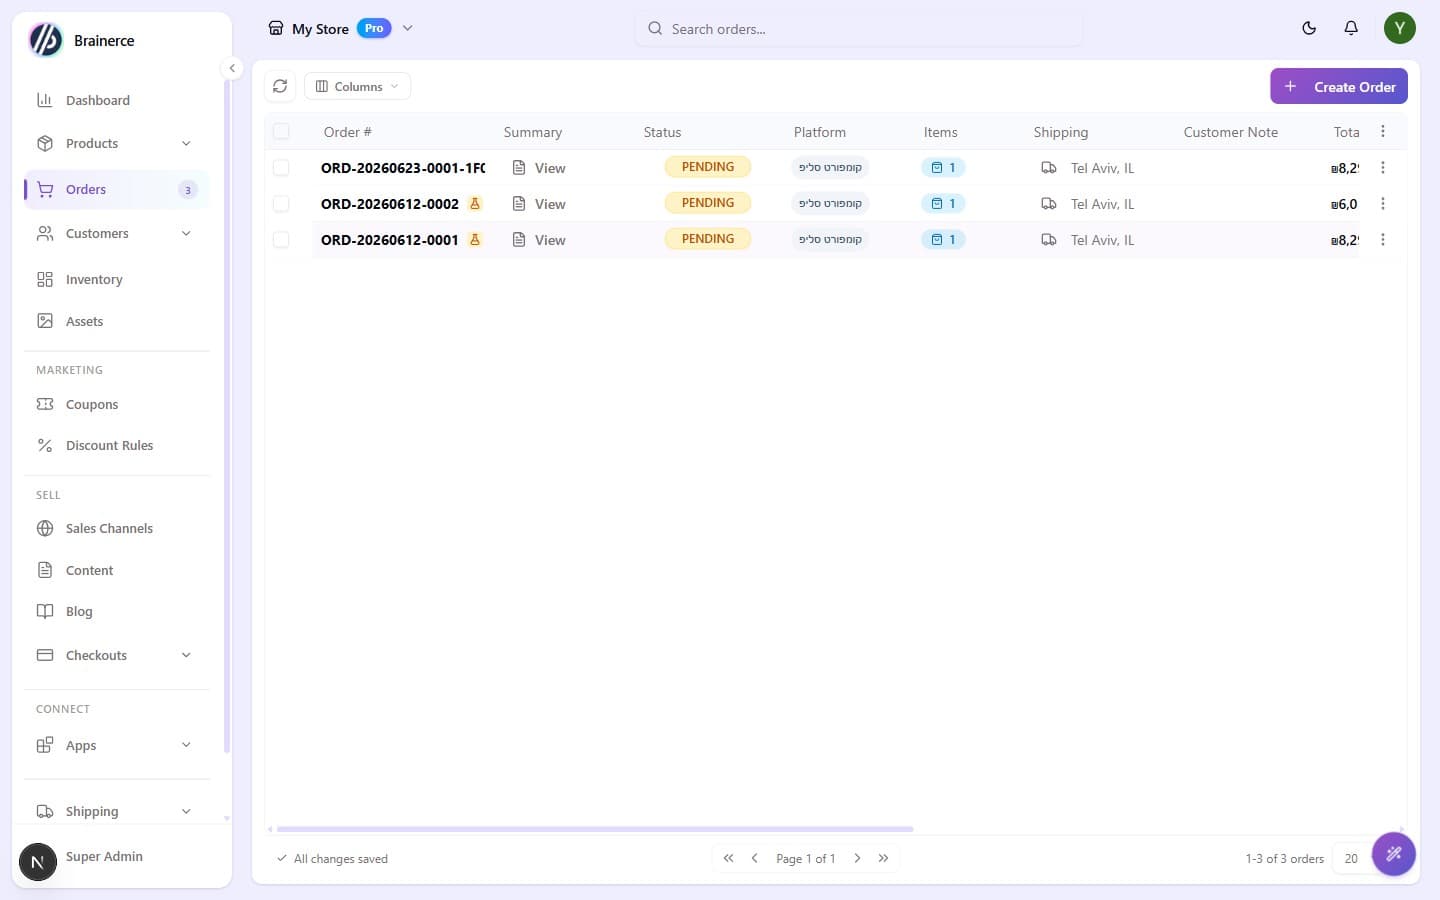
4242 4242 4242 4242, any future date, any CVC). - Back in the dashboard, Orders now shows your test order.
6. Go live
When you're ready:
- Open your provider from the Apps section of the sidebar and Reconfigure it with your live credentials. Switching to Live is not a toggle; it asks for the real keys.
- Make sure your provider is enabled for the regions you sell to (Settings → Regions).
- Share your storefront URL with your customers.
What's next?
- Add more products in bulk by uploading a CSV, or import a whole catalog from Shopify or WooCommerce once with the Migration Tool
- Set up shipping zones and rates
- Create your first coupon
- Invite teammates and assign roles
Not sure what to do first?
What to set up first gives the order to work in: connect a storefront before you design anything, regions before you price, and a real test order before you go live.