 Brainerce Help
Create your store
Spin up your first Brainerce store and get to know the dashboard.
A store in Brainerce is one brand or storefront: its own products, its own orders, its own customers, its own settings. Most merchants start with one and add more later.
Create your first store
When you first sign in, Brainerce walks you through a short setup wizard (not a single dialog). Every step has sensible defaults, and you can change anything later in Settings:
- Store basics: your store name, country, default currency, and default language (add more languages later). Multi-region stores can add extra regions here too.
- Modules. Pick which features are switched on for your store (toggle them later under Settings → Modules). A preset gets you started fast.
- Tax. Choose whether to collect tax and whether your prices include tax (VAT-style, common in IL/EU) or have tax added at checkout (US-style). You can add a first tax rate here.
- Shipping. Set a basic shipping rate and an optional free-shipping threshold. Skipped automatically if you sell only digital products.
- Email. Set the "from" name your customer emails are sent as.
- Summary. Review and finish.
Your store is created and you land on your store dashboard.
Get to know the dashboard
The left sidebar is your map. Here's what each section does:
| Section | What lives here |
|---|---|
| Dashboard | Sales overview, recent orders, key metrics |
| Products | Catalog, variants, modifiers, bulk import |
| Inventory | Stock levels, low-stock alerts |
| Orders | Order list, fulfillment, refunds, returns |
| Customers | Customer accounts, segments, addresses |
| Coupons | Discount codes and promotions |
| Discount rules | Advanced cart rules, BOGO, tiered discounts |
| Sales Channels | Your vibe-coded storefronts and connected platforms |
| Apps | Payment providers, shipping carriers, marketplace apps |
| Settings | Branding, taxes, languages, team, billing |
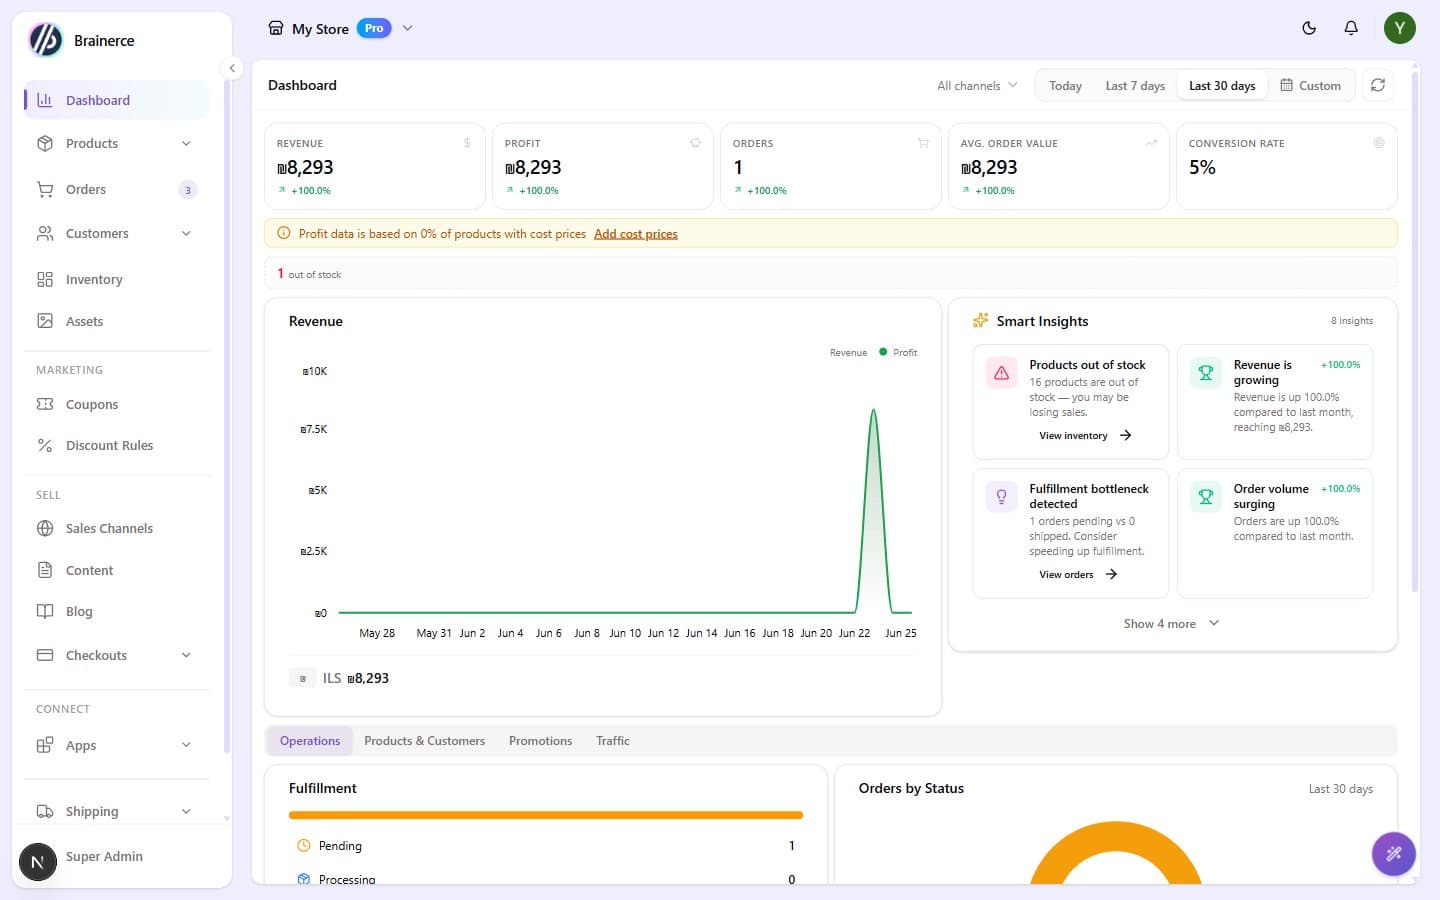
Almost every screen above is built around a data table. Before you dive in, take two minutes to learn how tables work: drag columns, pin them, hide them, and use the 3-dot table settings menu:
Switching between stores
If you create more stores later, switch between them with the store picker at the top-left of the sidebar.
Working on two stores at the same time
Each browser tab remembers its own store. Open a second tab, switch it to a different store, and you can work on both at once. Changing store in one tab never moves the other tabs, so nothing you do in one of them lands on the wrong store.
Each tab is named after the store it is showing, so you can tell your open stores apart from the browser's tab strip without clicking through them.
The ↗ button beside a store in the picker opens that store straight into a new tab, on its dashboard.
A tab you open fresh starts on the store you last picked.
Sending a link to a specific store
Add ?store= and the store's id to any dashboard address and the link opens in that store, for example /products?store=cmsn9sue7.... Usually the address bar already shows it, so copying what is there is enough, for a bookmark of your own or for someone on your team. A few screens tidy their own address and drop the ?store= part, so glance at the link before you send it.
A link is not an invitation. Whoever opens it still has to be signed in and be a member of that store, and if they are not, the page stays empty for them. To actually give someone access, invite them under Team and permissions.
Running multiple stores
Brainerce is built for multi-brand operators, so you can run several stores from one login and manage team permissions per store. A Free store is limited to one per account; add more stores on a paid plan, where each store is billed separately on its own plan. See Plans.
Next step
Now that your store exists, fill it with something to sell:
Sign up & log in
Create your Brainerce account in under a minute.
New store setup checklist: what to configure first before launching
A launch checklist for a new store in the sequence that avoids rework. Connect a storefront first, then products, regions and currency, VAT, payment providers, shipping, and a real test order before going live. Covers physical, digital and EU selling.