 Brainerce Help
Attributes
Define reusable properties such as Size, Color and Storage that auto-generate variant combinations and power storefront filtering.
Attributes are reusable option definitions. Once you create a "Color" attribute with values Red, Blue, Green, you can attach it to any product and Brainerce will auto-generate one variant row per combination.
They serve two jobs:
- Variant generation. "Size" × "Color" on a t-shirt generates S/Red, S/Blue, M/Red, M/Blue automatically.
- Storefront filtering. Customers can filter the product list by attribute values ("show only Red items in size M").
Attributes vs Modifier Groups
| Attributes | Modifier groups | |
|---|---|---|
| Creates | Variant rows with their own SKU + stock | Per-order options, no new SKU |
| Stock tracked? | Yes: S/Red has different stock than M/Blue | No: "extra cheese" doesn't deplete inventory |
| Examples | Size, Color, Storage, Material | Toppings, engraving, gift wrap, warranty tiers |
Rule of thumb: if every option needs its own stock count → attribute. If it's a customization at checkout → modifier group.
The attributes list
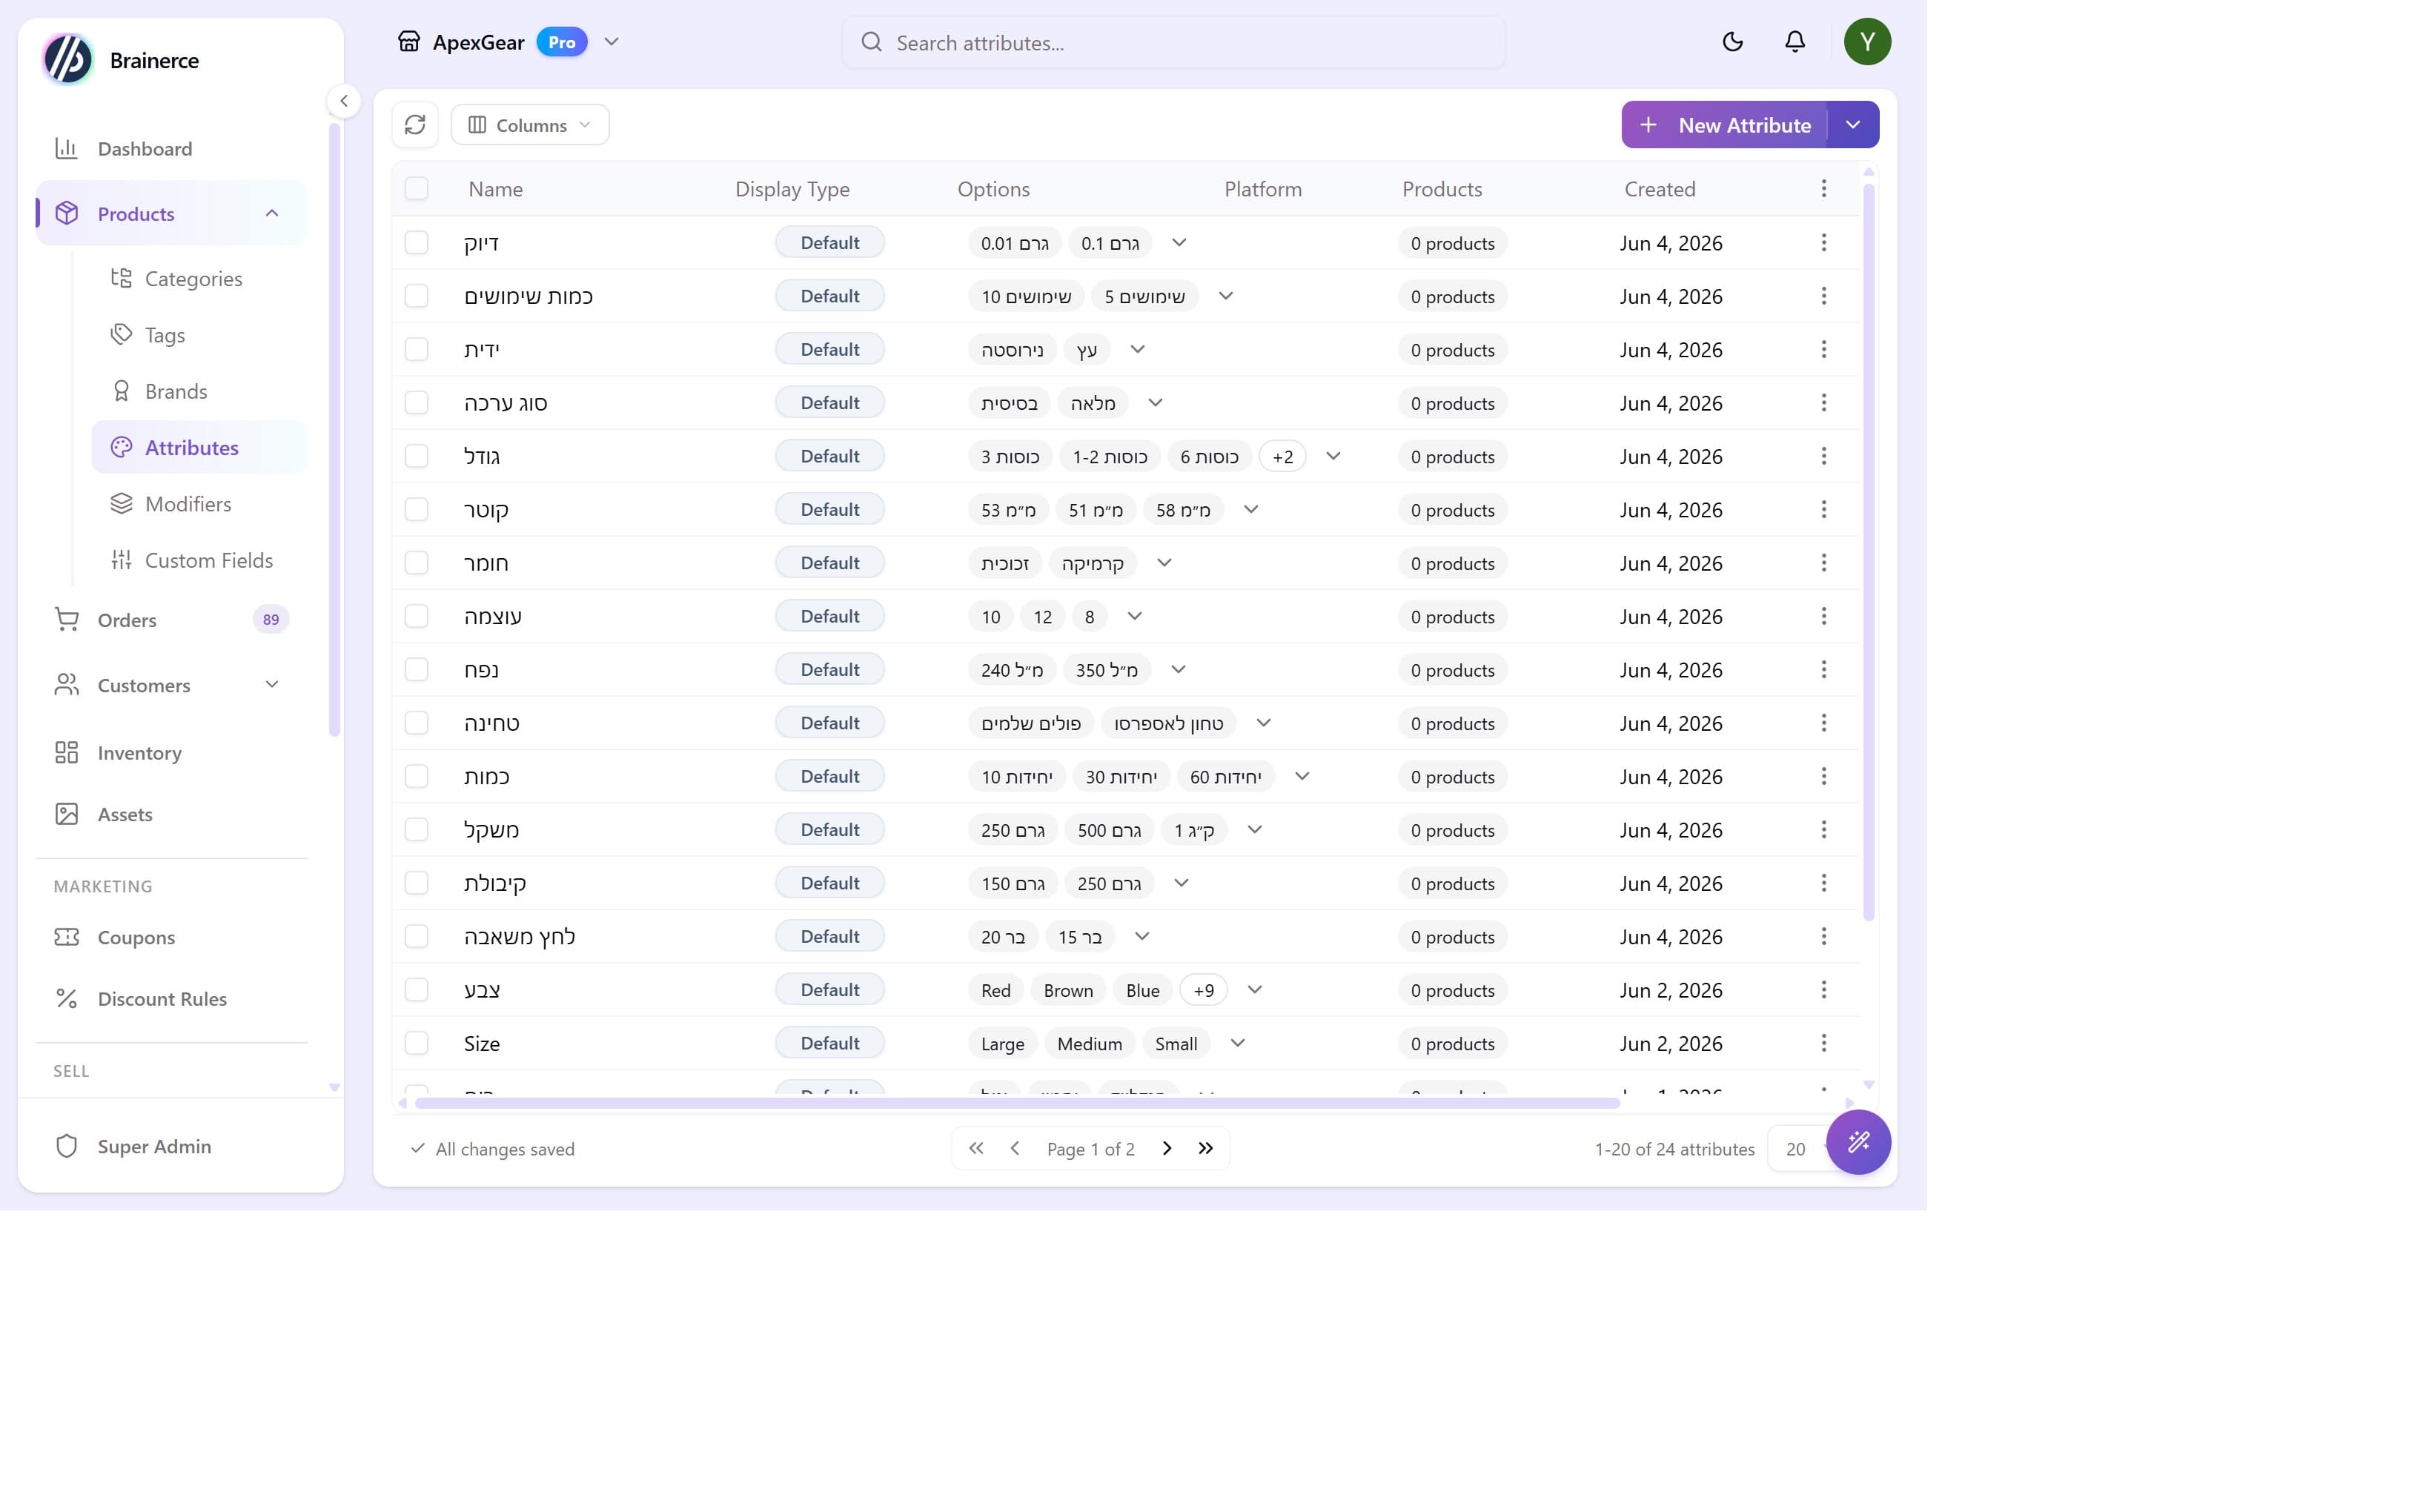
Go to Products → Attributes to see all attributes with their display type, a preview of values, how many products use them, and timestamps.
Don't see it in the sidebar? Attributes is a module, and it can be switched off for a store; some store types start with it off. Turn it back on under Settings → Modules.
Creating an attribute
Click New Attribute:
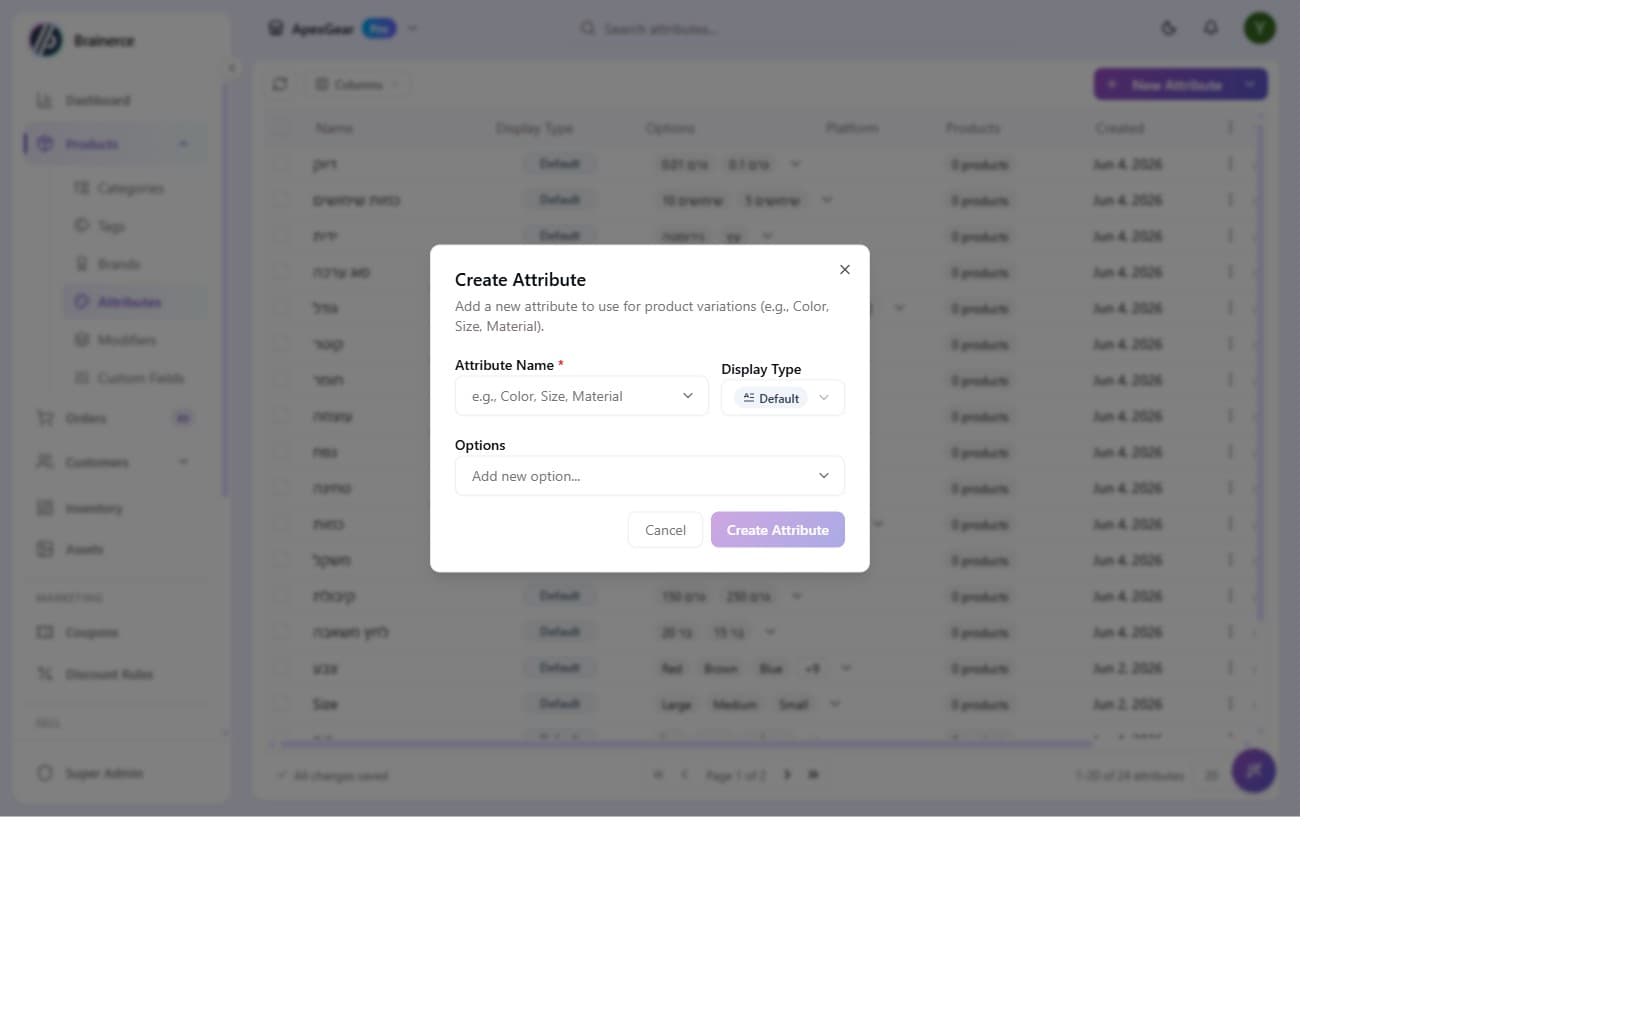
| Field | What it does |
|---|---|
| Attribute Name | Required. Use descriptive names: Color, Storage, Size, Material. This is what merchants see in the variant editor. |
| Display Type | Controls how the storefront renders the options. See below. |
| Options | The values for this attribute. See the Managing options section below. |
Display Types
The Display Type dropdown has four options:
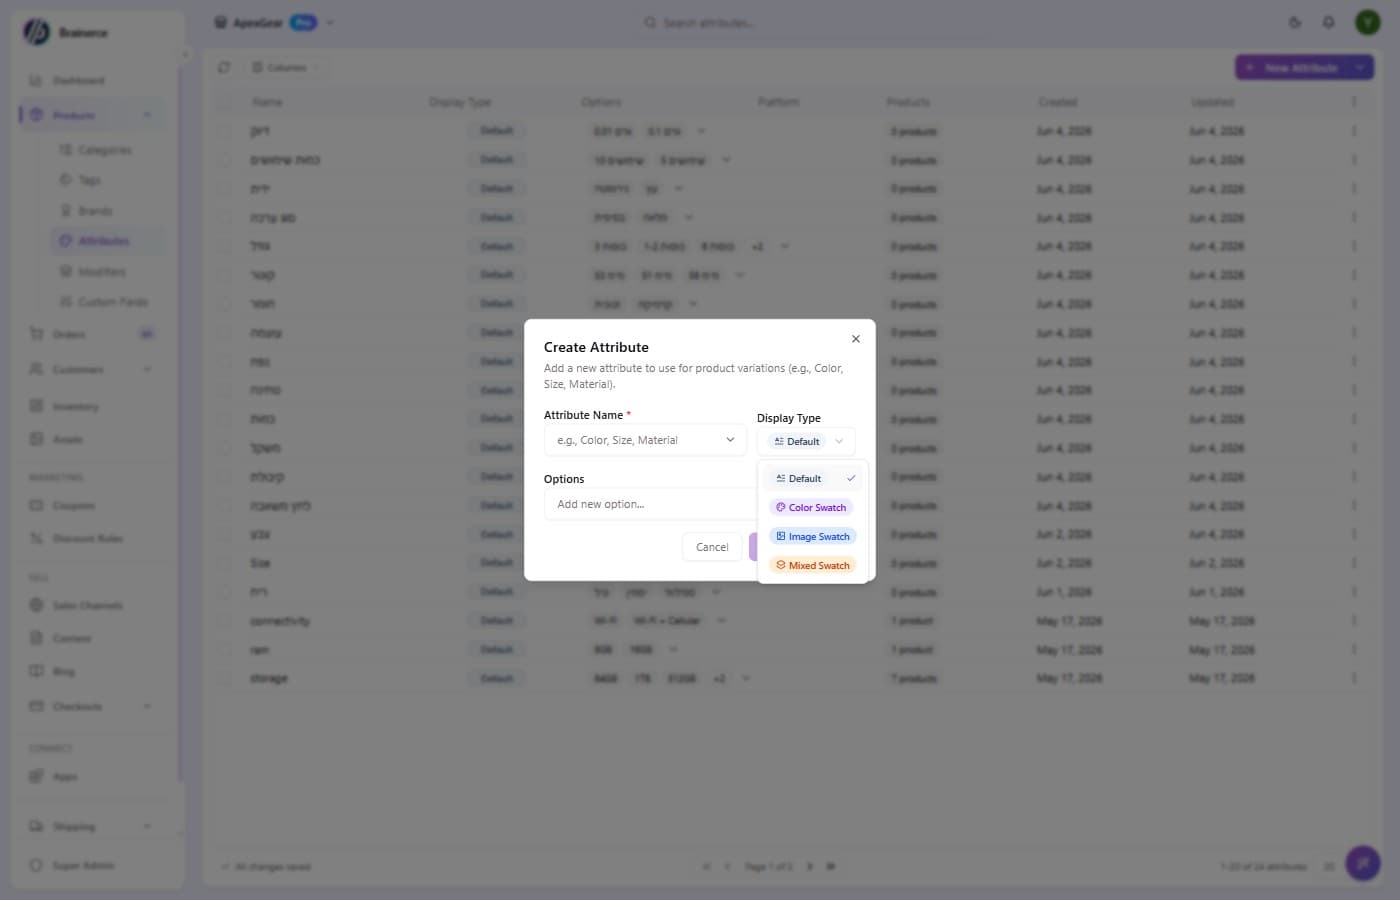
| Type | Storefront rendering | Best for |
|---|---|---|
| Default | Text labels (chips or radio buttons) | Size (S, M, L, XL), Storage (64GB, 256GB), Connectivity |
| Color Swatch | Colored circles, where each option value is a hex color or color name | Color, Finish, when you want visual swatches |
| Image Swatch | Small thumbnail image per option | Materials, patterns, or colors where a photo shows better than a swatch |
| Mixed Swatch | Combines color circles and image thumbnails in the same attribute | Apparel lines that mix solid colors and printed patterns |
Tip: You can always change the Display Type after creation; it only affects storefront rendering, not the underlying variant data.
Managing options
Options are the individual values inside an attribute: for a "Size" attribute they might be Small, Medium, Large, XL. You manage them in the same dialog used to create or edit an attribute.
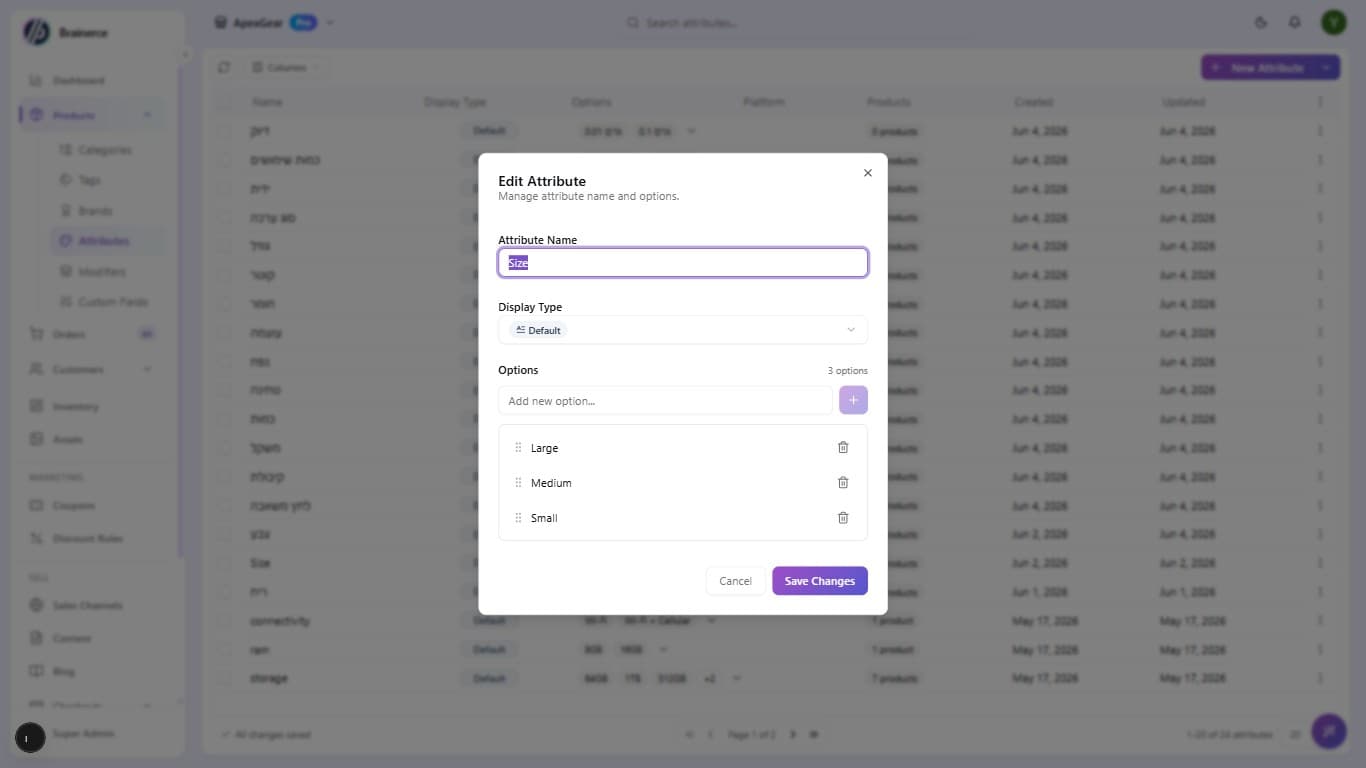
Adding an option
Type the value in the Add new option… field and click the + button (or press Enter). The option appears immediately in the list below with a count badge updating in the header (e.g. "3 options").
Reordering options
Options appear in the order you add them. The grip on the left of each row is a visual handle only; reordering an existing list isn't supported yet. To change the order, delete the options and re-add them in the order you want (check first that no variants depend on them).
Deleting an option
Click the trash icon on the right of the option row. If the option is already assigned to variant rows on any product, those variants are not automatically deleted, so you'll need to clean them up from the product's variant editor.
Renaming an option value
You can rename an option in place. Click its name in the options list, type the new one, and it saves. The new name replaces the old one on every product that uses the attribute. Rename "S" to "XS" on Size, and every variant called "S" becomes "XS". You do not need to add a new option and move variants across.
Renaming changes the name shown to shoppers, not a separate internal code, so there is nothing left pointing at the old spelling.
Translation works differently and does not rename anything: switch the dialog to a non-default language and each option becomes editable so you can type its translated name. That writes a translation alongside the original, which is what every product still stores.
Accessing options from the list
You don't need to open the New Attribute dialog to manage options on an existing attribute. From the Attributes list:
- Click the ⋮ menu on any row → Manage Options to open the Edit Attribute dialog.
- Click the options chips in the Options column, which also opens the same dialog.
Important: Changes to option values (rename, delete) immediately affect all products using this attribute. Renaming "S" to "XS" on the Size attribute changes it everywhere. If you need a value only for one product, add it as an option here first, then select it in that product's variant editor.
Attaching attributes to a product
Attributes are attached inside the Manage Variations dialog. Open any product, then:
- Click the gear icon ⚙️ next to the product type dropdown (only visible when the product type is "Variable Product").
- In the Product Attributes section at the top of the dialog, click an attribute chip (like
size,color) or type a new attribute name. - Click the Select options… dropdown next to each attribute and add the values you want for this product.
- Click Generate Variations and Brainerce creates one row per combination.
- Fill in Price, SKU, and Inventory per variant row.
- Click Save Changes.
See Add variants to a product for a full walkthrough with screenshots.
What's next?
- Add variants to a product is the full variant editor walkthrough.
- Modifier groups (add-ons) are for options that don't need separate stock.
- Bulk import from CSV loads hundreds of variant rows at once.
Custom fields
Add structured extra data to every product, such as technical specs, certifications, care instructions, or any field your catalog needs.
Categories & tags
Build your catalog hierarchy with categories and use tags for cross-cutting labels. Both are assigned to products from the same editor.